
You need to clearly define when and where it’s time to take action.
A binary yes or no:
- If we trade into the AoO → Enter (1)
- If we don’t → Wait for the AoO (0)
We can use the Area of Opportunity (AoO) to know exactly when and where to take action.
This brings clarity; it’s also a lot easier for your psychology.
Define Your AoO
The AoO is where you can confidently say that price action will move in your favor until we reach a target.
Trading is all about profiting from the move in between 2 PD Arrays.
We can split it up into 2 parts:
- The Trigger
For example, if we run a swing high, or if we trade back into an FVG. - The Target
This is where price can ‘potentially’ stop for a while.
The area from the Trigger to the Target is the Area of Opportunity.
Let’s explore what these ’Triggers’ can be.
The Triggers
Triggers are confirmations. The confirmations that we can confidently say price is heading towards a further target.
My favorite Trigger for an AoO is a Run on Liquidity, which confirms that we’re moving towards the next target.
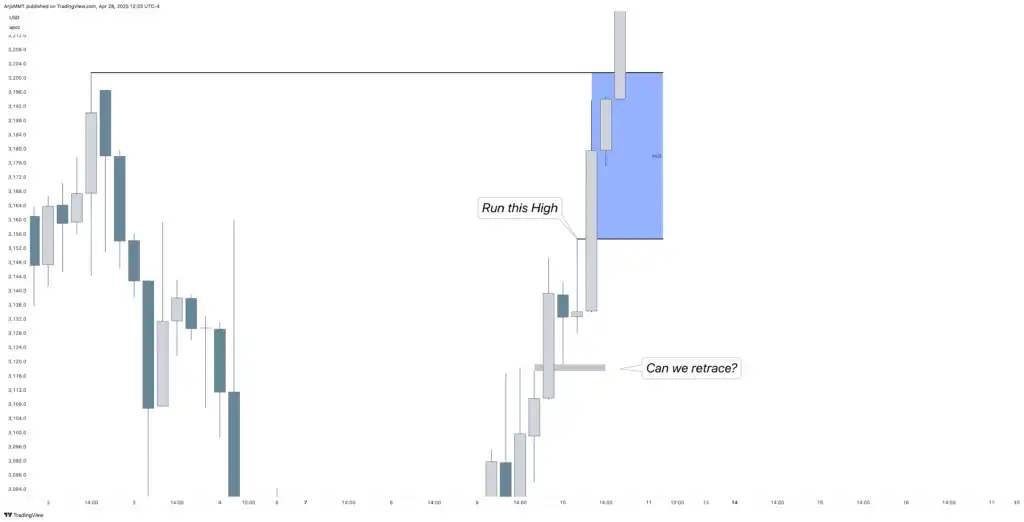
For example, here on Gold, for a trade that I took and was discussed during the live session in the MMT.
Example 1
There is some doubt here, are we going to retrace into the FVG? Or are we already going to continue higher?
That doubt is easily resolved with the AoO. Either it triggers or it doesn’t, in the meantime, I just wait.
If we run this high here, it’s a Trigger that we’re going to go towards the All Time High. So above that high is my AoO, expecting no steep retracements anymore since we’re running the high.
Example 2
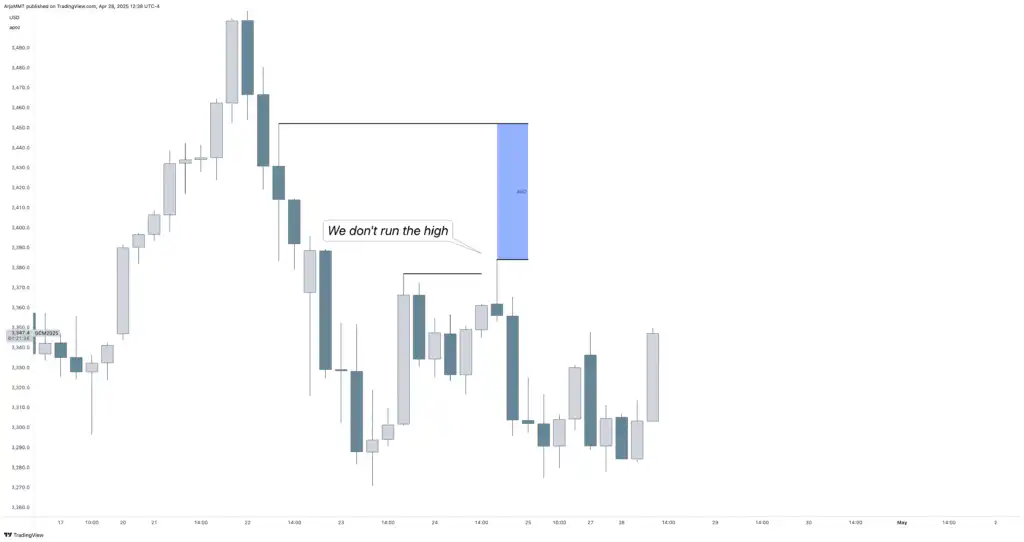
Last week, I also identified this AoO again on Gold. But we never ran the high, preventing me from taking an unnecessary loss.
Now you have clearly defined where to look to get involved, leaving very little room for human error.
Always here if you need me!
Arjo Janssens — MMT