
I’m here to help you with your Daily Bias struggles.
I mainly trade for investors, but I like to test concepts in a “real” environment with money on the line.
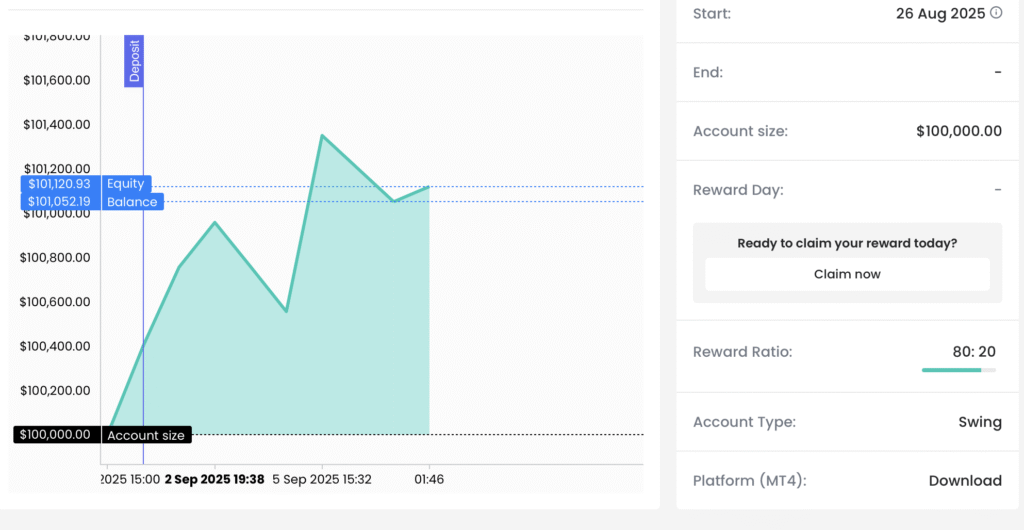
That’s exactly what I did here, getting ready for a second payout on this account.
A big part of that is understanding exactly what I want to see in my Daily Bias:
Daily Bias
This is an accurate representation of the Daily Bias:
– – – – – – – – – | – – – – – – | – – – | – – – – – – – – – – – | – –
– = Waiting/Uncertain
| = Acting/Certain
Bias, especially Daily Bias, is not always going to be clear. But there will be brief moments where it’s “obvious”, those moments are quite objective.
Let’s first understand the two different Biases.
We have an HTF Bias, which I think is not really the problem. We can always have some idea of what the market eventually wants to do.
This is because of the HTF Order Flow, Market Structure, just looking at what the market has already been doing, and whether it can continue in that same direction.
Example of HTF Bias:
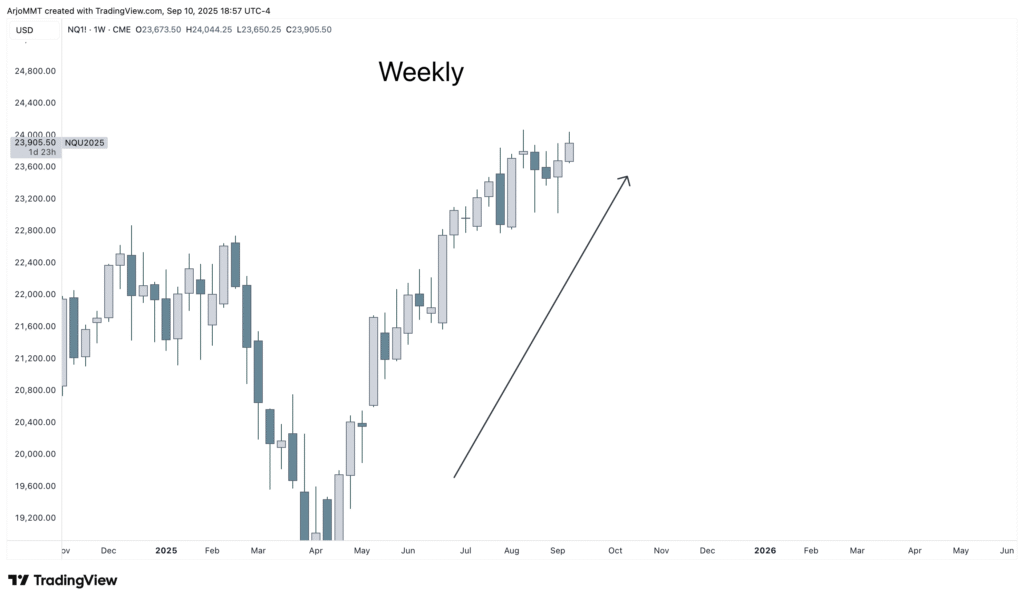
We’ve been quite obviously moving higher. But that doesn’t mean we can just click buy anywhere as traders, we still need to understand the Daily Bias.
We always want the Daily Bias to be in line with this HTF Bias.
Bias 2 – Daily Bias
The clear Daily Bias we need before acting, before actively looking for the trade. More so, a short-term Bias.
This can be achieved through 2 methods.
- What are we rejecting from?
- What is preventing us from continuing higher?
Both these options come down to 1 thing: we’re always looking to trade in-between PD Arrays.
A clear Daily Bias is whenever we trade from 1 PD Array to the next PD Array.
That’s not going to be present 24/7. When I say Daily Bias, I’m not just referring to the Daily Candle, this can be applied to any timeframe.
It’s about understanding: Which PD Array are we likely going to reach for next?
The way we can understand that is by understanding which PD Arrays we’ve been respecting and which ones we’ve been disrespecting.
PD Arrays
Before we move on, I need you to understand what I mean by “trading in-between PD Arrays”
The whole story is about PD Arrays, let’s narrow down our focus to purely FVGs and Swing Points (Swing Highs and Lows).
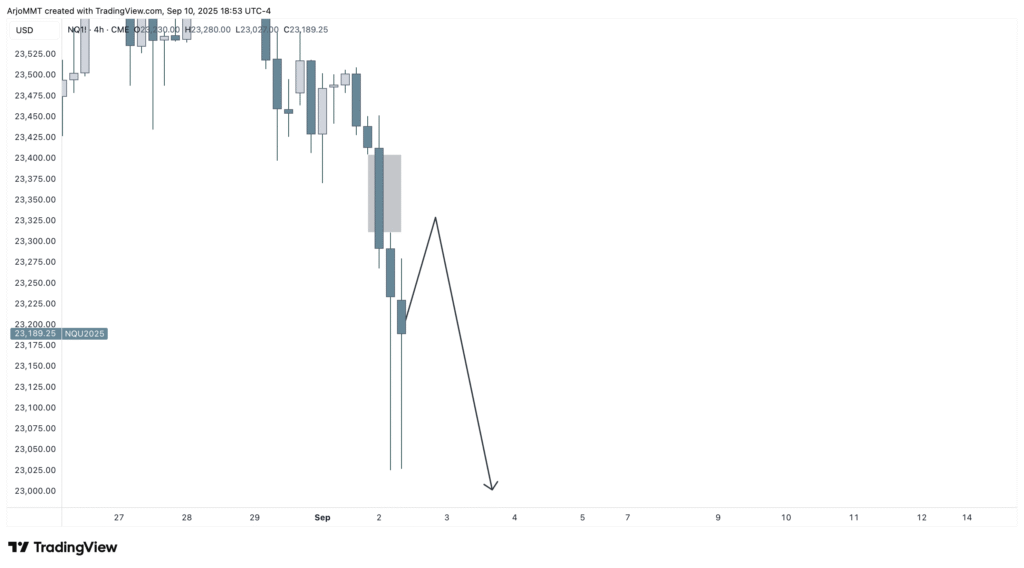
In price we tend to continue lower and higher because of PD Arrays. So we might trade back into an FVG and then continue lower from it, something like the example below:
That would mean if we fail to continue lower from that FVG, then it could be the Swing High that pushes price lower. Like this:
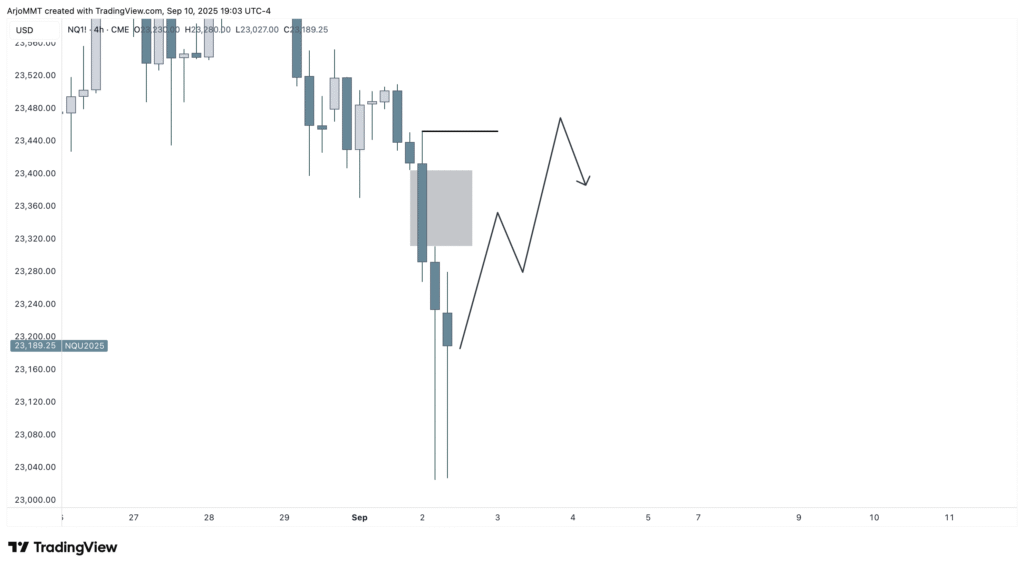
This is now where we’re getting to “trading in-between PD Arrays”.
Because the above pictures essentially mean that there’s a short-term opportunity there, a clear Daily Bias.
The green area:
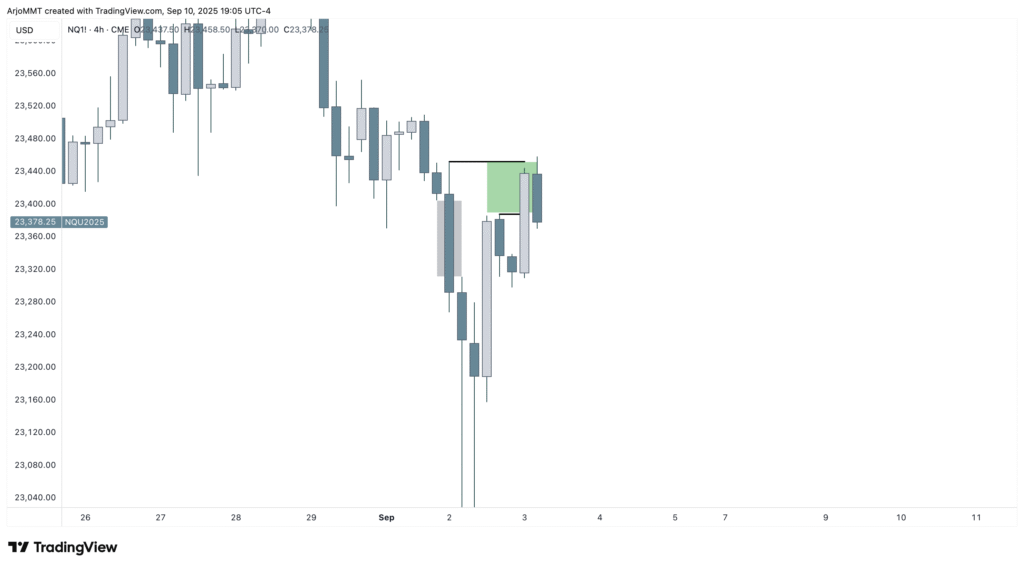
Why is this?
Price is free to move in-between PD Arrays. Because at that moment on that timeframe, price is not rejecting from anything until the next PD Array.
Let’s go over a few examples of how this translates to a clear Daily Bias.
Respect / Disrespect
Back to the two methods we mentioned of a clear Daily Bias.
Let’s first go over method 1:
- What are we rejecting from?
If we respect a Swing Low, then it’s likely we’re reaching for the next Premium Array
Why? Because we’re trading in between PD Arrays, where price is free to move.
The second method is my favorite. - What is preventing us from continuing higher?
If we’re disrespecting a Premium Array, it’s likely we’re going to reach for another Premium Array.
Because that’s where price is moving in between PD Arrays freely.
The green boxes are the areas in between PD Arrays. Every green box is where the Daily Bias for a brief moment is obvious.
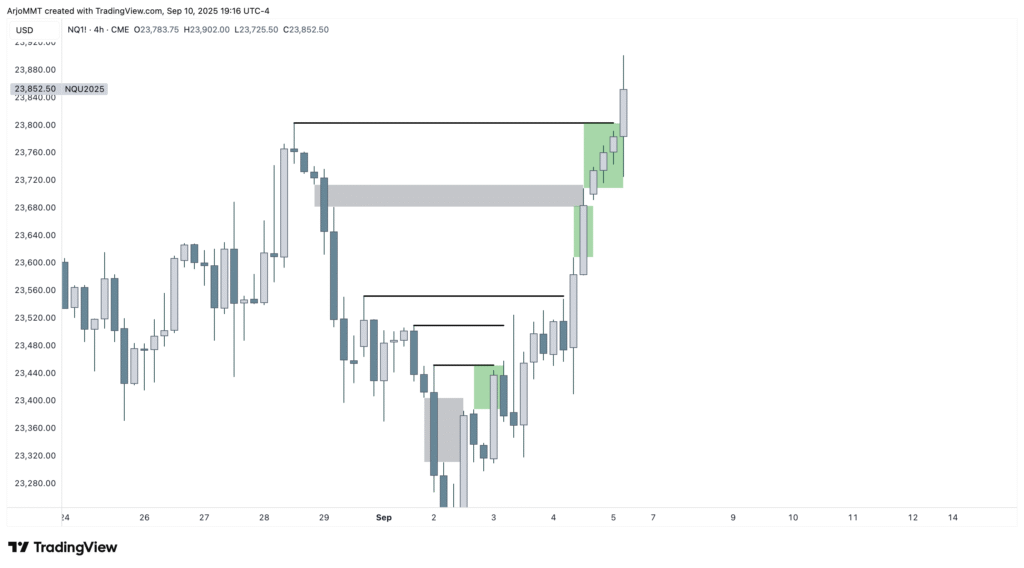
We know a PD Array is being disrespected by understanding 2 Candle Rejection.
1st candle is a rejection → 2nd candle can continue in the same direction.
1st candle is not a rejection → 2nd candle can sweep the 1st candle to then create the rejection
Based on those rules, either the 1st candle or 2nd candle is the rejection high.
The green boxes are drawn from the moment we run the rejection high to the next PD Array.
Because if we run the rejection high, then we’ve disrespected the PD Array. Once that happens price if now free to move until the next PD Array.
You don’t need to wait for a full 2 Candle Rejection. You can go into the Lower Timeframe and see if we’re running or sweeping the 1st candle high.
Timeframes
The green boxes above are marked out on the 4-hour timeframe, giving you a very easy time to get involved, for example, on the 5-minute or 1-minute timeframe.
But you can apply this to any timeframe, for example, the Weekly:
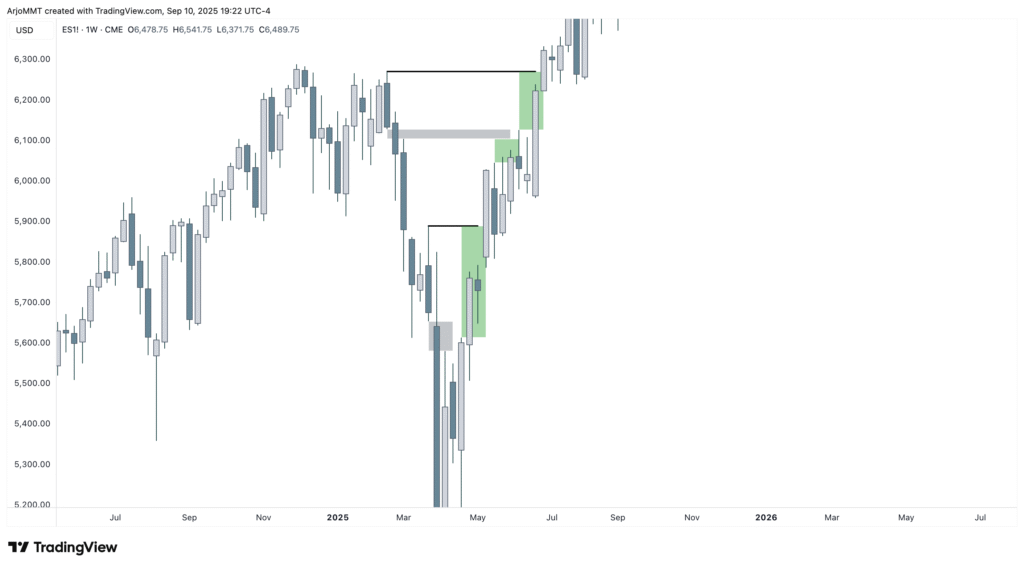
You can take this even a step further by applying 2 Candle Rejection on one timeframe below.
But start off by mastering this, trading becomes so straightforward because all you’re doing is constantly trading in-between PD Arrays.
AoO
This, in the MMT, is also known as an Area of Opportunity, where you eventually look to trade.
If you just focus on trading in between PD Arrays for your Daily Bias, you’ll know exactly what you’re waiting for. You gained a piece of Clarity.
Have a great day.
Arjo Janssens – MMT