
Your Stop Loss placement can be the difference between a loss or a win.
Let’s go over how to place your SL properly.
Spoiler: The answer is in your data, what works best for YOUR trading plan. Sorry for the boring answer.
But besides that, here are some more interesting key insights:
Don’t Do This Here
The biggest mistake I’ve made, and I see too often in others, is thinking that the bigger the SL, the safer it is.
If you can have a reasonable SL of let’s say 10 pips and you now try to make it “safer” so you make it 20 pips, then that might seem logical right? Well, at the same time, if you target 1:2RR, you have now increased the distance of your Take Profit (TP) from 20 pips to 40 pips, double the price action you need in your favor now.
Offense is the best Defense here. Sometimes the more aggressive an SL is, the better, since it means you only need a tiny rejection in your favor for the trade to win.
This, of course, doesn’t mean you always need to have the SL of a scalper. It’s relative.
Here are the guidelines on where to place your SL.
1. Understanding The Legs
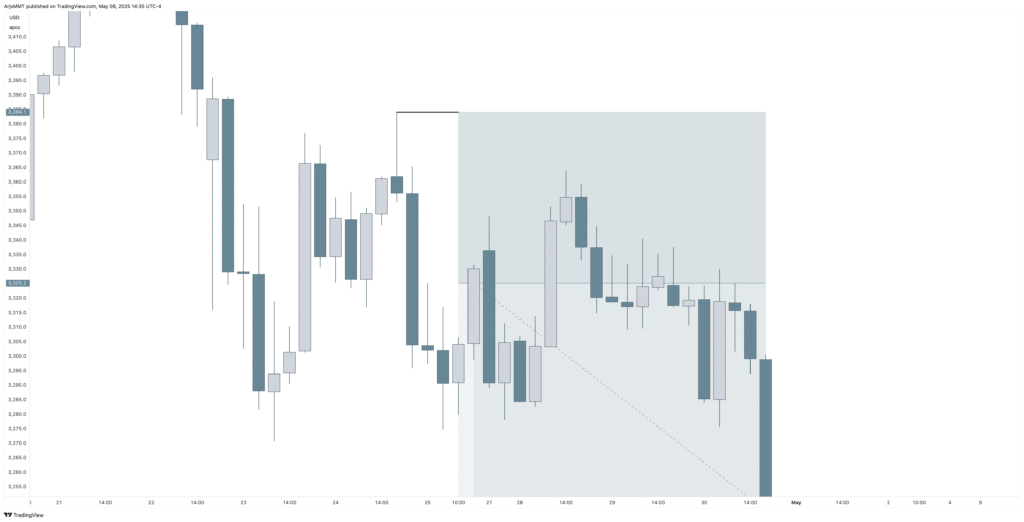
Probabilities tell us that a leg, for example a Swing High followed by a Fair Value Gap, is less likely to trade above the Swing High. It will likely respect the Fair Value Gap or Fair Value Area and then continue lower.
On the contrary, if there’s no FVG in the leg, it’s likely to sweep it before continuing.
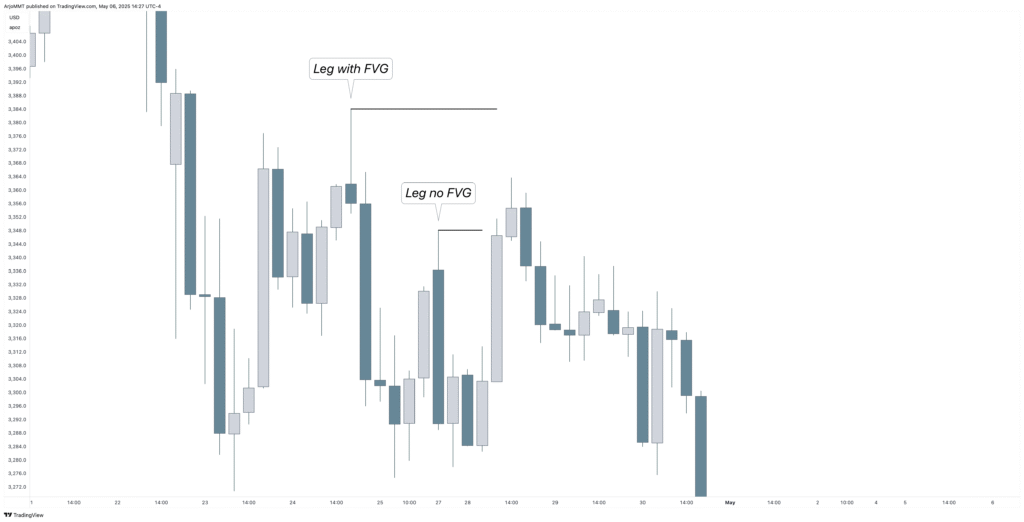
This already gives us an easy understanding of where to place the SL, above the Swing High.
For example:
But we can take it a few steps further:
2. Different Conditions Matter
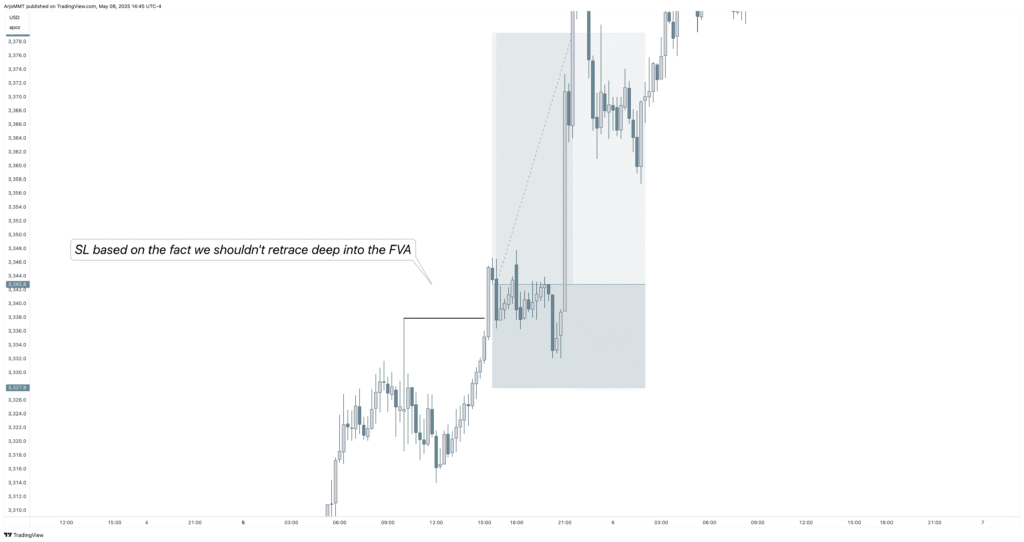
Your SL should go at the area where price turns from high probability to low probability, in other words, where price SHOULDN’T return.
And depending on the price action at hand and your entry, this can change.
For example, in a more consolidation style like the example above, yes, the price could struggle a bit more before continuing higher; this is the risk you take when you place the entry.
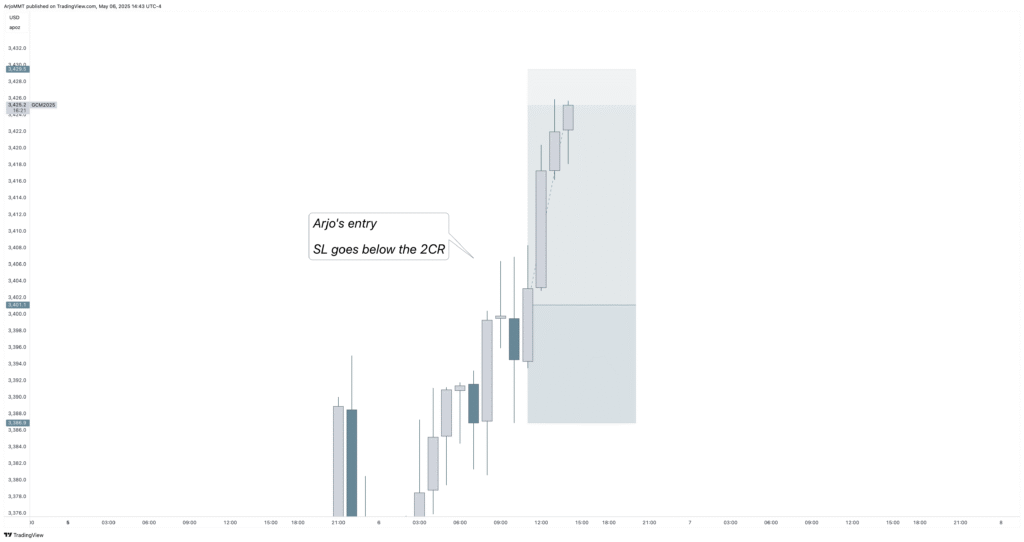
But if you enter in good trending conditions, no consolidations or anything, your SL can be tighter.
This is where 2CR comes in, and understanding how far we can retrace:
3. Understanding 2CR and FVA
2CR:
- 1st candle is a rejection → 2nd candle can expand
- 1st candle is NOT a rejection → 2nd candle can reject
This is important to understand if you for example enter off of a PD Array with 2CR or even on when to move your SL to Break-Even.
Or in a scenario like this where you have a Fair Value Area:
Important
When you understand the concepts, you can get creative with them; these are all great SL placements.
But, the best SL placement (as mentioned at the start) is the one that is backed by data for your trading plan. So if you notice you get taken out of trades quite often that initially moved in your favor, but your SL is too wide, then look at the rules above to refine your SL.
And of course, the MMT can easily help with your problems in real-time like no other.
Always here if you need me!
Arjo Janssens — MMT